
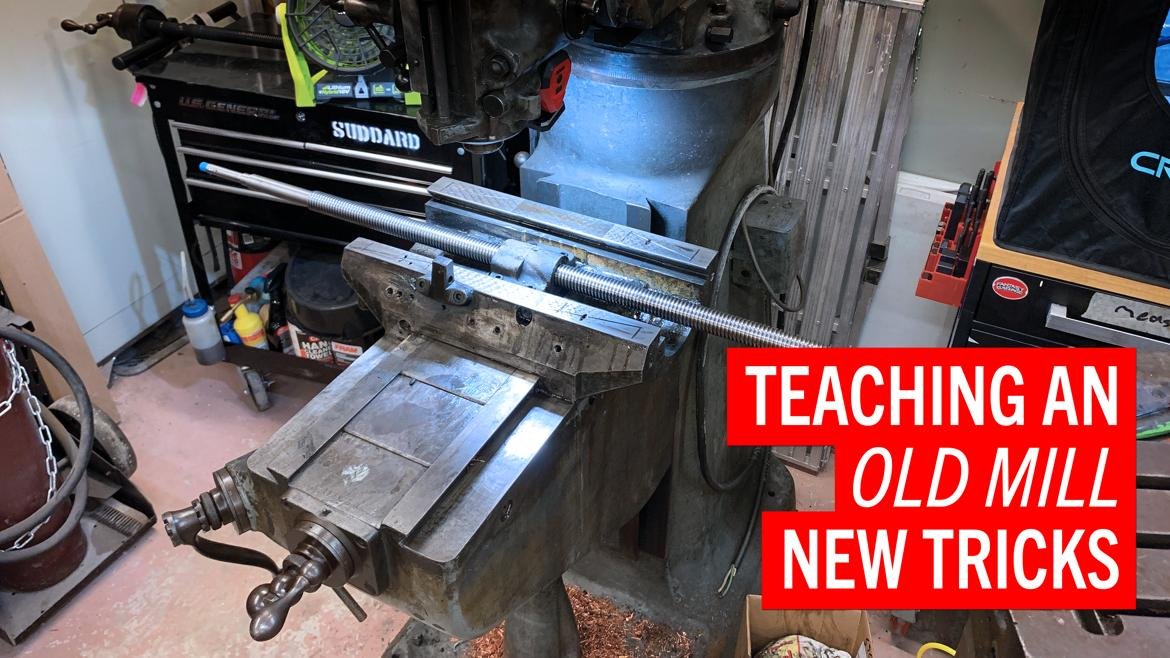
We’d discovered an outdated Bridgeport mill, dragged it residence and positioned it in a handy nook of our storage. Now there was one final step earlier than we might begin machining: Get it working.
As with every used automobile, plan on going by way of a used mill after shopping for it. Ours was lacking some {hardware}.
Luckily we reside in trendy occasions, so replacements had been just some clicks away. We ended up spending about $500 and a month discovering, ordering, making and putting in the required components–primarily a brand new leadscrew (the threaded rod that strikes our X-axis) and powerfeed (mainly a motor).
Getting Energy
Machine assembled, we wanted to energy it–and that’s the place issues obtained difficult.
Like most industrial equipment, our Bridgeport got here with a three-phase electrical motor. It doesn’t matter what form of plug we hooked up, it wouldn’t run from the single-phase energy provide in our storage.
What the heck is a three-phase energy provide? In essentially the most primary phrases, it’s a very totally different kind of energy discovered solely in industrial services, because it’s extra environment friendly at driving huge electrical motors just like the one on our Bridgeport.
Getting our energy firm to produce three-phase energy to our residential tackle was someplace between insanely costly and not possible, so we wanted to someway convert this three-phase machine to run on single-phase energy.
For years, the best approach to do that was with a rotary section converter. These huge, costly machines–about $500 for one appropriately sized–flip single-phase energy into three-phase energy.
However that is 2022, and there’s a extra reasonably priced, smaller, less complicated approach to run a three-phase motor: a variable frequency drive. Your electrician can inform you extra, however mainly a VFD prices lower than $100, is in regards to the dimension of a burrito, and may simply run three-phase motors on single-phase masses.
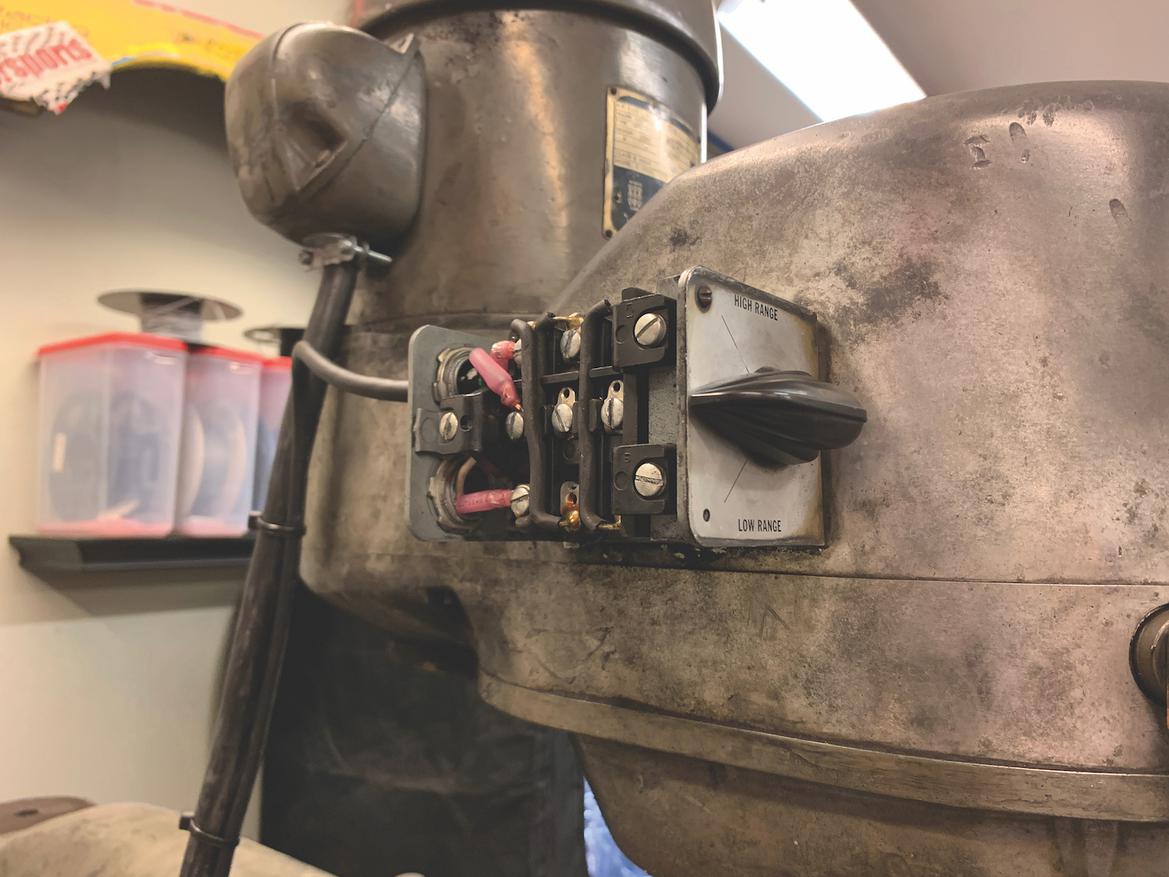
Our Bridgeport, like a variety of heavier industrial tools, makes use of three-phase energy, one thing you’re not more likely to have in your storage. To energy the mill in our residence store, we wired in a variable frequency drive.
We ordered one on-line, then constructed an enclosure for it on the aspect of our machine utilizing components from a neighborhood electrical surplus retailer. Identical to that, our Bridgeport might plug into the usual welding outlet in our storage. We even wired within the OEM motor swap to regulate the VFD so our machine nonetheless seems to be and runs similar to another Bridgeport.
VFDs have one different trick up their sleeve: They will infinitely fluctuate the velocity of the motor they’re driving, which is nice in case your mill doesn’t have a variable velocity head like ours. We didn’t want the velocity management, so we set our VFD to at all times run at 60 hertz, the usual for the U.S.
Can You Learn Me Now?
We now owned a Bridgeport with working axes and a working motor, however after utilizing the mill for few easy tasks, we realized we simply couldn’t make correct components with it. After double-checking our setup, we found out the issue: We merely weren’t ok with the dials on our Bridgeport.
Every deal with has a dial graduated in 1000’s of an inch, and turning a deal with 10 thousandths of an inch theoretically means the device will transfer 10 thousandths.
So why couldn’t we make correct components? Easy: compounding error, the machinist’s solely pure predator. Each time we flip a knob, it’s not precisely excellent–that will be not possible. So a 0.010-inch transfer may truly be 0.011 or 0.009 inch.
This will get worse whenever you change instructions, as each leadscrew has backlash. If an operation has 20 actions, the errors rapidly add up.
These issues are minor whenever you’re making huge, easy components–who cares if one thing is 3.001 or 2.999 inches lengthy?–however they’re important relating to small elements that want to suit collectively.
Oh, and utilizing the dials is sluggish, too. Each transfer requires figuring out the place the device sits and the place it must be so you’ll be able to add or subtract the correct movement. Maintaining monitor of the place the device is throughout every transfer requires a calculator and scratch paper, which takes time and presents extra alternative for error.
There are two methods to resolve these issues. The primary: Turn out to be a machining savant who can spin every knob completely, right for error and backlash in actual time, and monitor the device with out scratch paper. That’s in all probability how individuals did this within the Thirties, however we don’t have the time or persistence, and perfecting our method with knobs won’t ever be as correct as the opposite choice: Set up a digital readout, generally abbreviated as DRO.
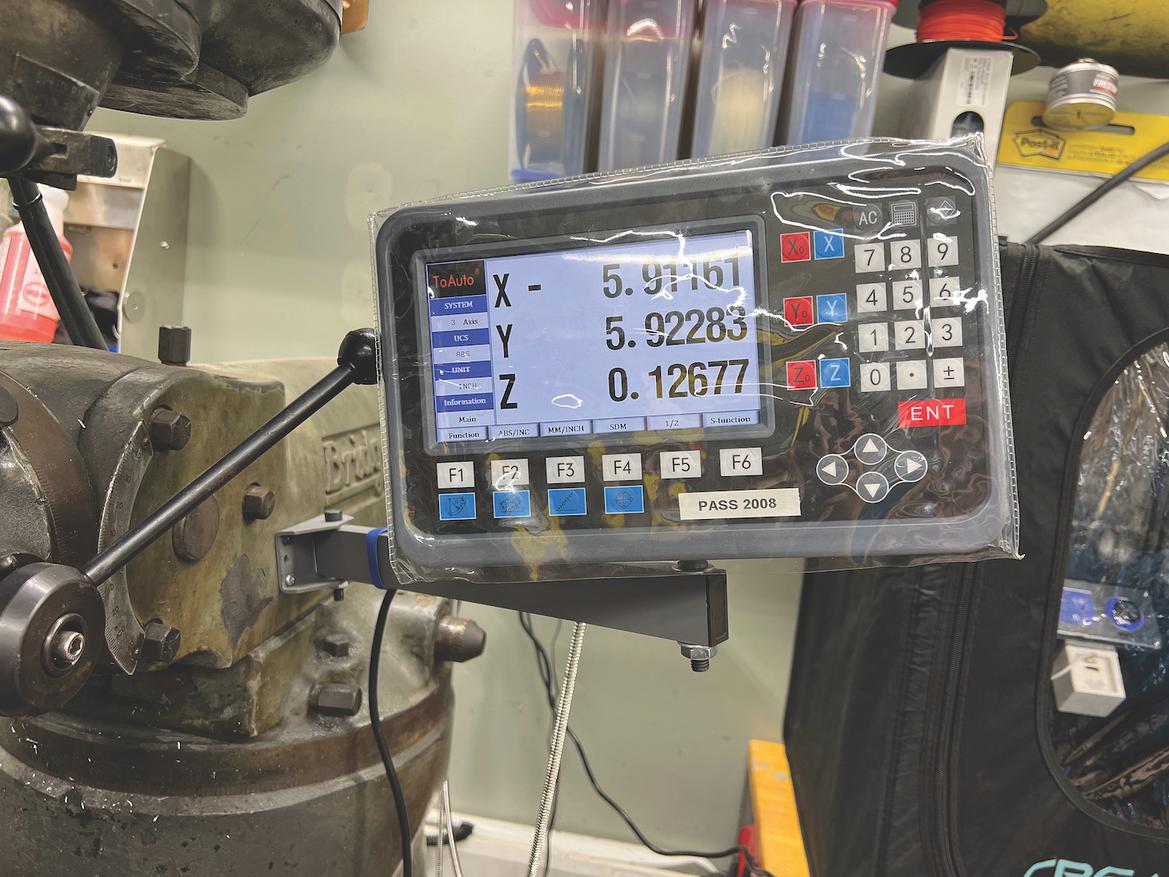
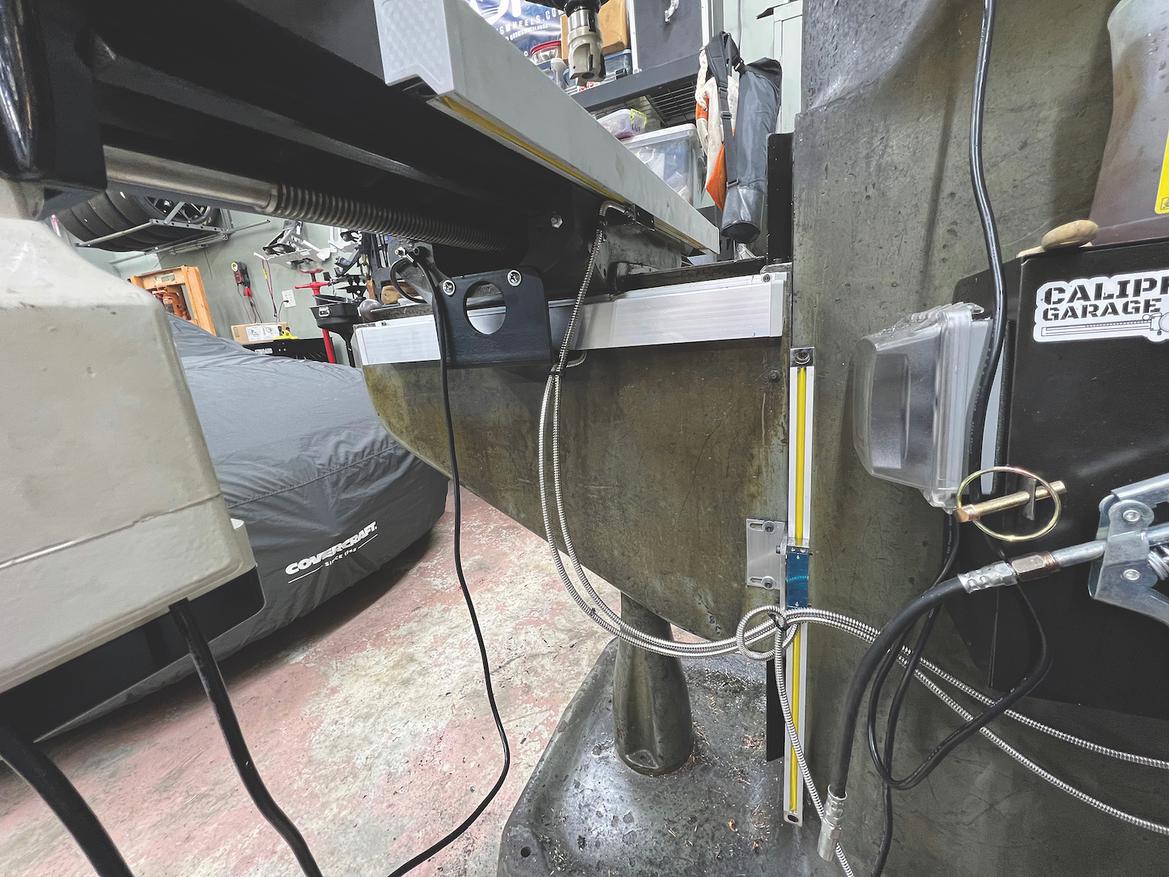
Extra trendy expertise: As a substitute of turning knobs to make cuts, we put in a digital readout.
DROs are superior as a result of they monitor the place of the axis, not the handles or screws. In different phrases, fairly than measuring the enter and inferring the output–like these scales on every knob–they simply monitor the output. That is extra correct and means measurement errors don’t compound over time. Plus, DROs show this data on an easy-to-digest show, which additionally incorporates a calculator and a few built-in formulation to compute extra complicated geometry.
Okay, let’s go DRO buying. You should purchase a name-brand DRO for about $2000 or an off-brand one for as little as $200. Costs fluctuate primarily based on the standard of the show, the standard of the devices truly measuring every axis, the mounting {hardware} included, the variety of axes, and the post-sales assist.
We selected a generic, imported LCD show, pairing it with generic glass scales. We measured our machine’s x, y and knee (z) journey, then specced the glass scales to suit.
DROs can measure device place through glass scales, like our setup, or through magnetic scales. These are much less breakable but in addition appear to price three to 5 occasions extra. Glass scales work effective, theoretically, so long as you’ll be able to preserve a strip of glass clear and intact subsequent to a machine that actually shakes the bottom when it’s turned on. Fingers crossed.
All informed, this DRO system price $391. We saved a lot of cash by making our personal mounts for every thing, selecting an off-brand, and deciding on the extra fragile glass scale design. As little as we’ll use this machine in comparison with a manufacturing store, we didn’t really feel the extra sturdy scales had been definitely worth the worth enhance. We’ll simply have to ensure to maintain these away from impacts and coolant. The LCD show was admittedly a little bit of a splurge, however the interface must be a lot less complicated to know than an eight-digit LED show with mediocre directions.
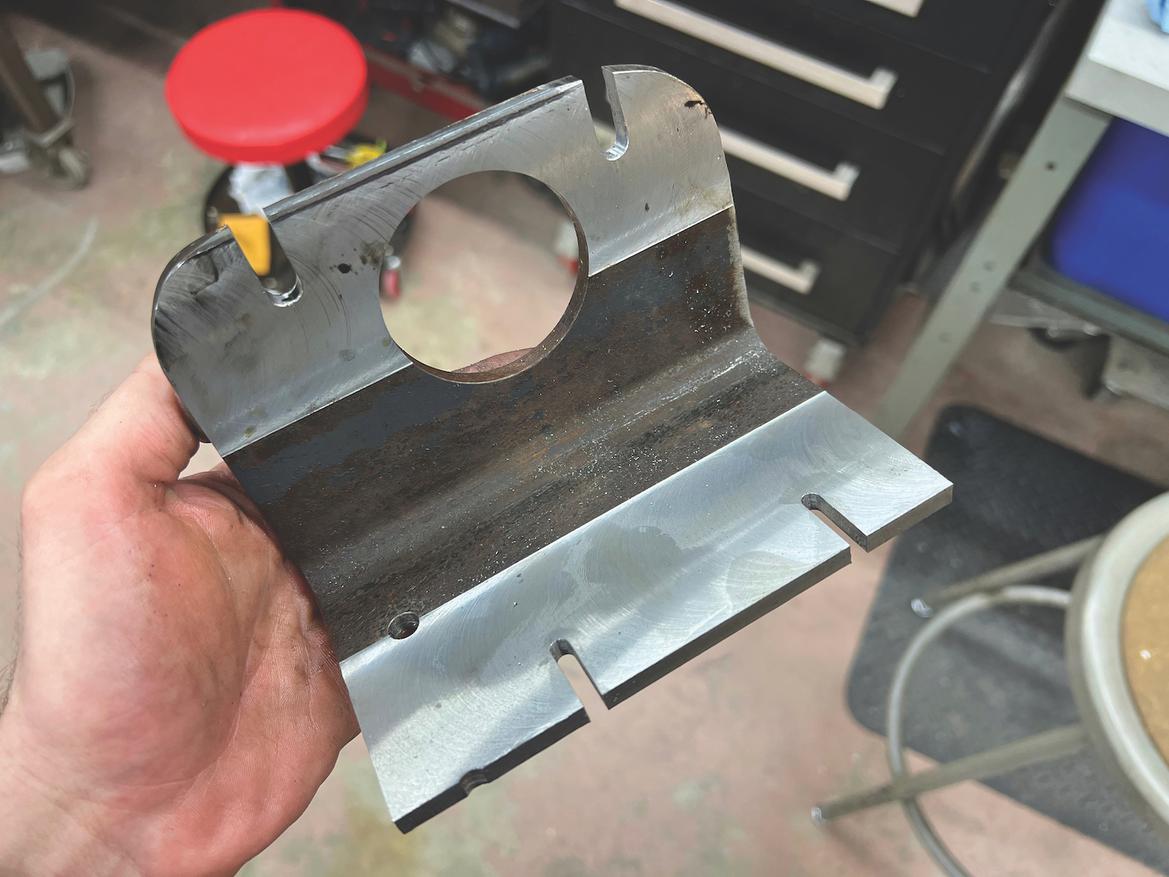
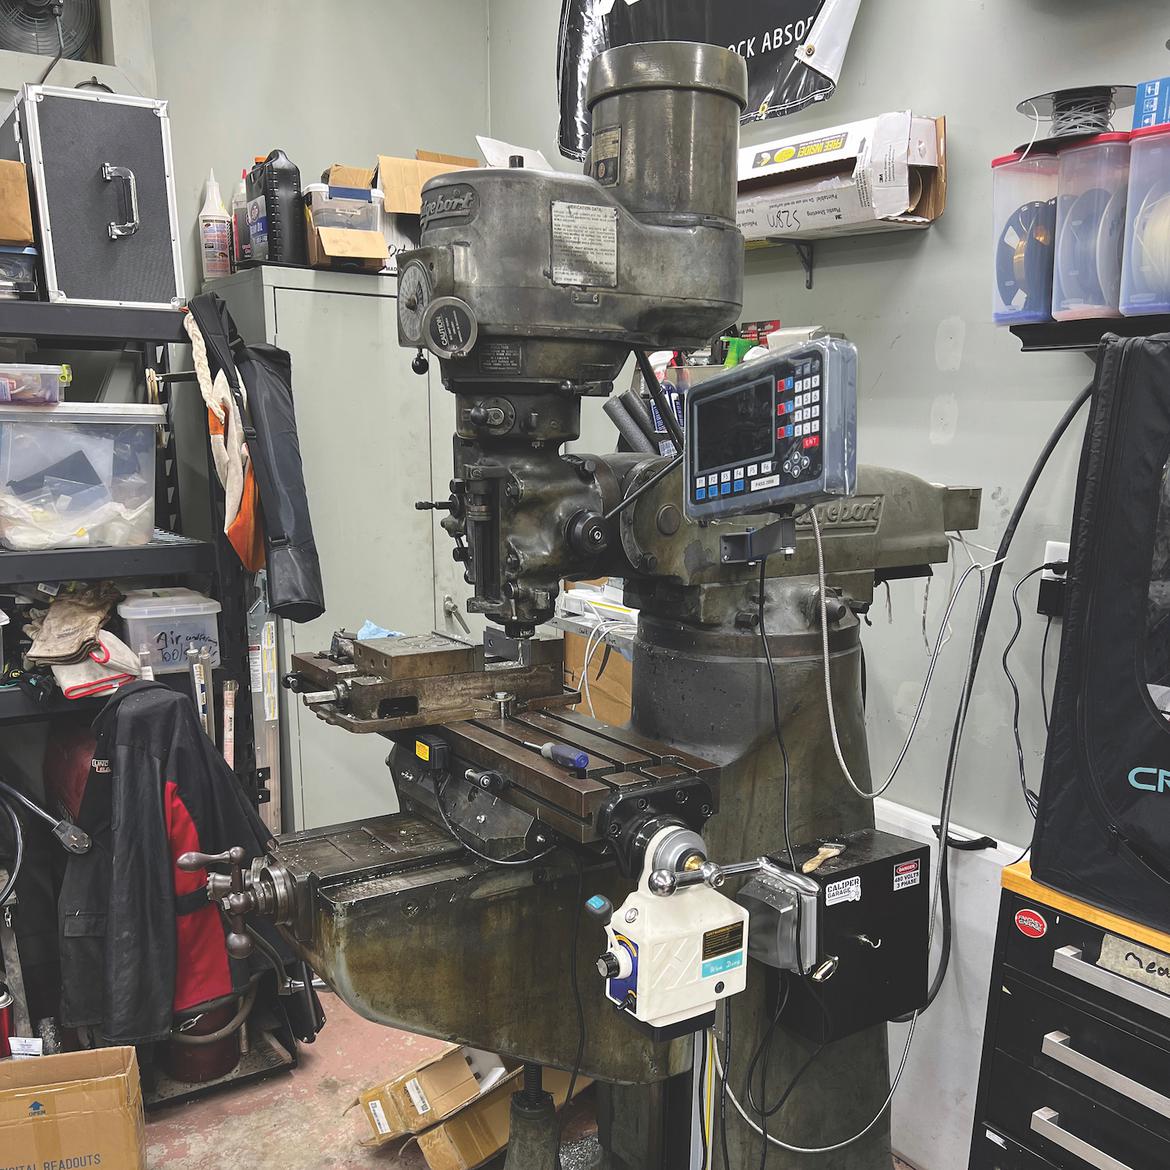
We needed to make some brackets to connect the required glass scales, however for lower than $400 we improved our mill’s accuracy.
Set up took a couple of evenings and principally concerned drilling and tapping a lot of holes. Actually, we solely wanted to make one half, a mount for our machine’s y-axis scale head. Lastly, we might precisely transfer the machine alongside every of its three axes. It was time to make some components.
What’s Subsequent?
It’s possible you’ll not have realized it, however there’s been an elephant within the nook for this whole story: tooling, or the chances and ends we pair with our mill to really make components.
Frequent knowledge says shopping for tooling will dwarf our preliminary funding within the machine itself, that means we’ll spend at the least $3000 simply on equipment. However is that true, and does it should be? We’ll discover out within the subsequent installment of this collection, once we purchase a vise, rotary desk and every thing else wanted to make components with our new machine.
Trending Merchandise


