We had a race automotive, we had some new fiberglass bumpers, however sadly, we didn’t have a technique to be a part of the 2. So, utilizing some easy instruments and strategies, we made our personal bumper brackets.
1. Excellent news: This fiberglass bumper weighed in at about 5 kilos, serving to us avoid wasting essential weight from the nostril of the automotive. However the unhealthy information: The brand new bumper didn’t embrace any mounting brackets.

2. The bottom of the piece was merely hollowed out, so our new brackets would want to fill this void whereas mating to the automotive’s OE bumper mounting factors.

3. We began fabricating the brackets by making a template with a file folder, scissors and a few tape. With a little bit trial and error, we shortly had the form we wanted.

4. We held the bumper as much as the automotive to find out the depth of our templates.

5. Utilizing the primary template, we created a brand new template with 1-inch mounting ears.

6. The primary template was then used to make our bending instrument out of two items of scrap plywood: a hammerform. Every bit of wooden is lower to the identical form, with the hammerform serving as a low-tech die. In a number of steps, we’ll clamp our sheet steel inside the 2 items of wooden and hammer the mounting ears 90 levels.

7. Subsequent, we used the second template to mark our slicing and bending traces on a chunk of 20-gauge sheet steel.

8 + 9. After utilizing a middle punch, we drilled 1/8-inch holes on the corners of our essential bends. The bumper and bracket will in all probability vibrate and flex a little bit, so these holes ought to assist cease any cracks from forming.

10. We trimmed the sheet steel clean to its ultimate form with shears.

11. We spent a little bit time with a sander radiusing all of the corners to keep away from stress risers and forestall any sharp edges that might lower somebody.

12. We might now connect the 2 items of our hammerform to the bracket utilizing screws.

13. We clamped the hammerform right into a vice and bent every tab over it utilizing a plastic hammer. Any hammer would have executed the job, however the plastic one doesn’t mar the half. We bent the sheet steel in steps, too: first to about 30 levels, then to 60 levels, and at last, all the way in which to 90 levels.

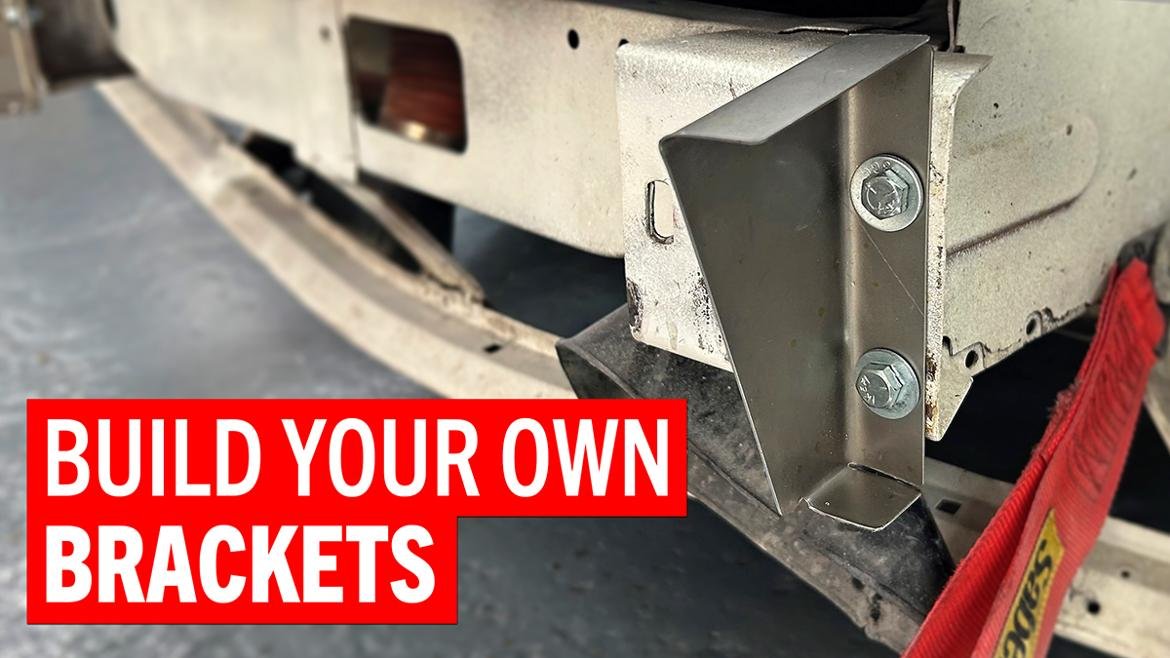
14. We’d ultimately make 4 brackets to connect the bumper to those manufacturing unit mounts. We slotted the inventory mounts for up-and-down adjustment.

15. We clamped our first bracket to the mount and, after test-fitting, marked the mandatory holes with a everlasting marker. The aim was to position the bumper’s peak in the course of the adjustment vary.

16. After correcting for marking our holes barely off middle, we used a step drill to place 5/16-inch holes in every bracket’s mounting tab.

17. Right here’s the primary bracket, completed and bolted up.

18. We repeated the method for the subsequent three brackets.

19. We made brackets for the perimeters of the bumpers with the same course of.

20. With the brackets completed, we fitted the bumper, drilled it for 3/16-inch rivets, and bought out our rivet instrument.

21. All completed, the bumper matches effectively after just some hours of labor.
Trending Merchandise